MAS.863, Fall 2011
Week 6
Molding and Casting -- Nyancat party! in Egg, Silicone, Plastic, Hydrostone, Aluminum, and Foam
We can use molding and casting to easily replicate a design.
The analogies between this manufacturing process and internet memes are clear.
Thus, I am compelled to make nyancats!
Aluminum paperweight. File done in solidworks, export as DWG to Mastercam, turned on CNC lathe (daewoo puma) and milled with engraving tool to 0.02’’ depth on CNC mill (EZ trak). Used as mold positive.

Smooth-on OOMOO25 used as silicone mold (negative). 100 parts A : 130 parts B by weight, pot time ~15 minutes, cure time ~1 hour.
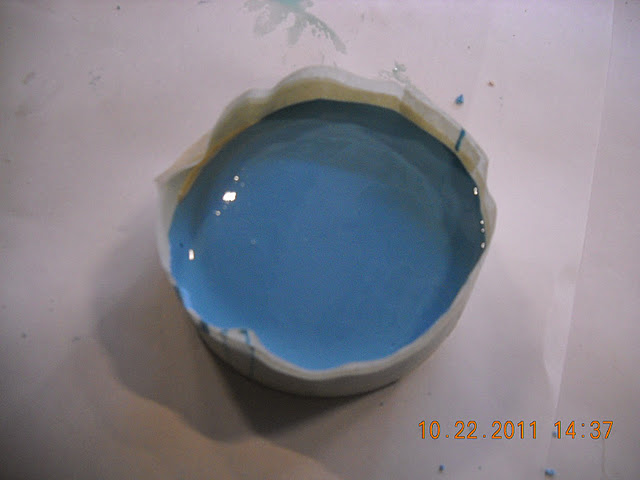
Masking tape used to form “walls” for negative mold.
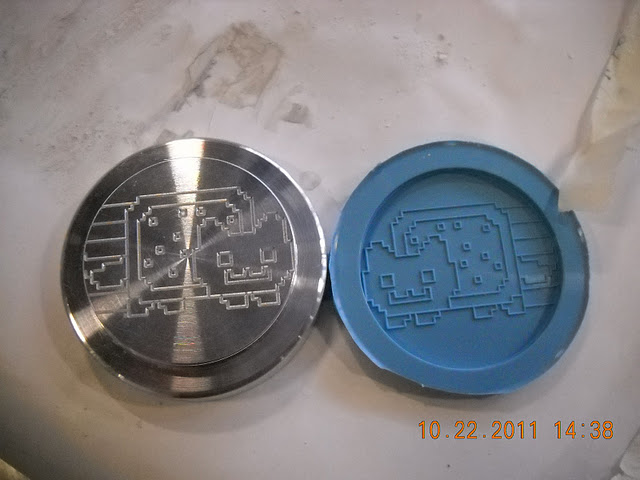
Released fine (no releasing agent used). Fine features (0.02’’) reproduced cleanly.

Hydrostone casting, positive.
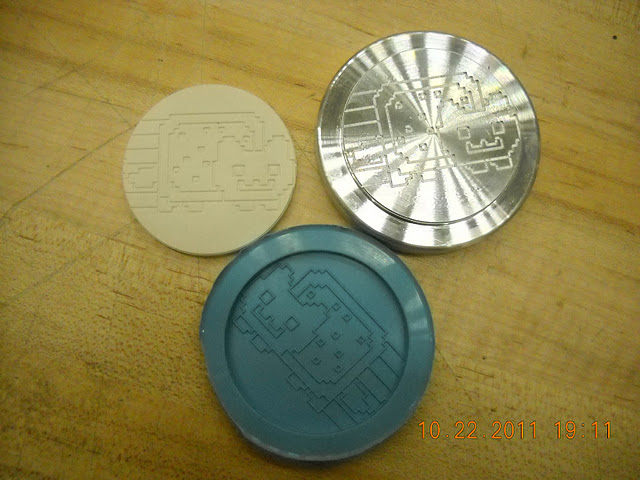
Final result: one nyancat party.
nyanegg?
Just for fun: some egg?

End result:

Not so great. I await the shopbot 3D mold.
hot glue mold: jello legos
Previously on Bad Ideas:
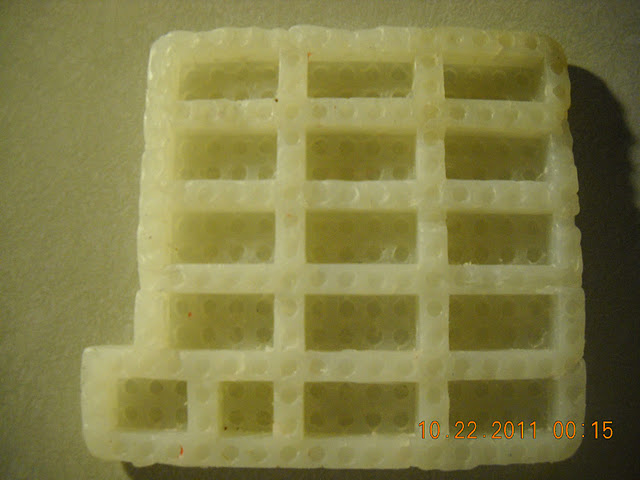
Hot glue is nontoxic, right? Legos used to create positive for hot glue. Crisco applied as releasing agent -- did not release well, had to pry out legos, destroying them. Jello poured in -- very nice, can even see the “LEGO” lettering on the bumps. Jello lego’s had flat bottoms though, since this is a one-part mold.
nyancake?
On Saturday, I learned that I now have media lab shop access and can now devote my entire weekend to MAS.863! Yay!
I made the model in Solidworks while still hoping I could get my hands on some food safe silicone. This didnt happen, though Iḿ not sure why. Ah well. I went ahead anyway and cut my model on the shopbot out of foam
.
1/8´’ bit, though later I remember I had resized my model specifically for a 1/4´’bit which could have cut my time down by half. After 1.5 hours of cutting I had my mold (the partworks estimate was 45 minutes). The deepest parts the shopbot just barely cleared (that was nervewracking!). The cut-out toolpath the shopbot most definitely did not clear -- I was prepared and hit the e-stop button immediately.

There were a lot of burrs and the finish quality was less than what Id expected. But Iḿ not complaining, since Iḿ using a shopbot to cut out an internet meme...
I attempted to deburr with a heat gun but stopped immediately when I realized I was rounding out my beloved sprinkles. I ended up using an air compressor and getting pink sprinkles all over myself.
Then I cast a negative mold with smooth-on silicone, in this case mold star slow since the arch shop was out of oomax 25. Pot time 50 mins, cure time 4 hours. After 1.5 hrs I took my mold with me instead of waiting. Mold turned out fine. Probably used half a smooth-on set of material.
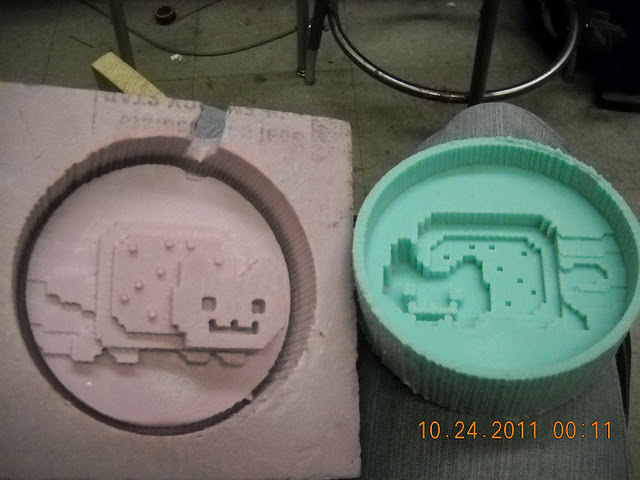
I had to commit some violence to the mold original in order to get the silicone out, simply due to the geometry of the piece. The silicone separated from the foam just fine.
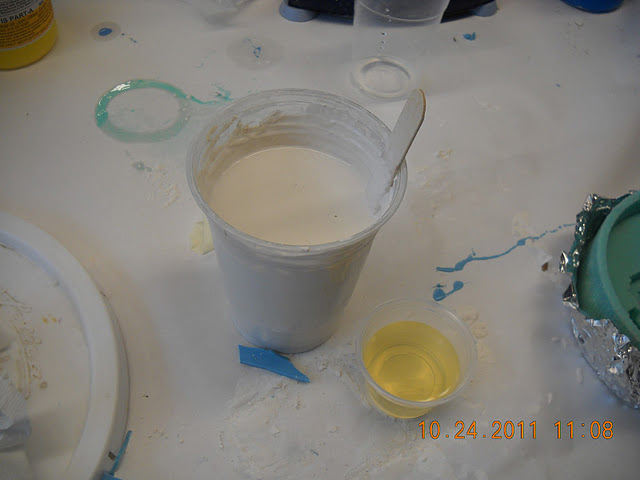
Drystone casting followed. Required almost exactly ~1.5 cups of material. (500grams?)


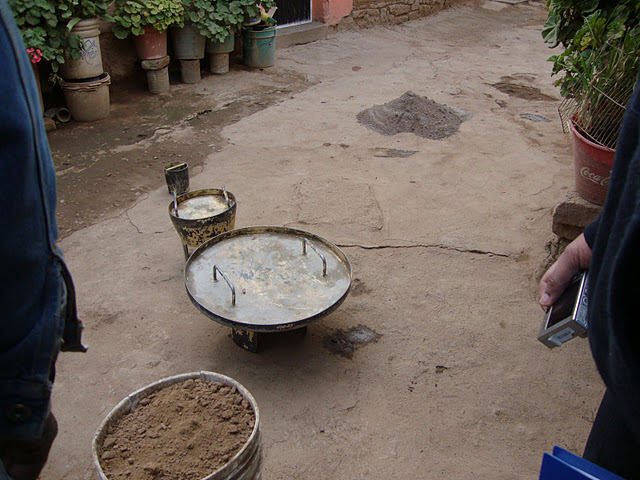
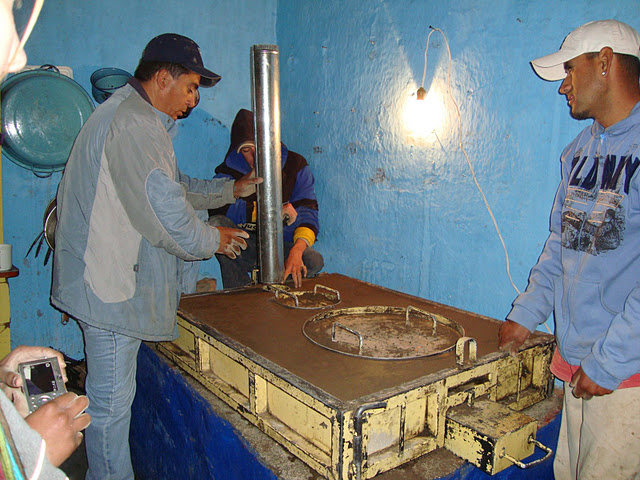
Oh, this reminds me, I´ve done sand casting before too. We helped sand-cast a cement health-friendly stove in La Vaquita, Mexico. This was a government initiative of some sort.

Files coming soon. [edit: 4 Sept 2012. So maybe not soon. But I'll try to get around to it. Also I would like to point out to blog readers that I went on to make nyancake and nyanjello! :D http://orangenarwhals.blogspot.com/search/label/nyancake
Week 6
Molding and Casting -- Nyancat party! in Egg, Silicone, Plastic, Hydrostone, Aluminum, and Foam
We can use molding and casting to easily replicate a design.
The analogies between this manufacturing process and internet memes are clear.
Thus, I am compelled to make nyancats!
| nyanweight? nyancoaster? |
Aluminum paperweight. File done in solidworks, export as DWG to Mastercam, turned on CNC lathe (daewoo puma) and milled with engraving tool to 0.02’’ depth on CNC mill (EZ trak). Used as mold positive.
Smooth-on OOMOO25 used as silicone mold (negative). 100 parts A : 130 parts B by weight, pot time ~15 minutes, cure time ~1 hour.
Masking tape used to form “walls” for negative mold.
Released fine (no releasing agent used). Fine features (0.02’’) reproduced cleanly.
Hydrostone casting, positive.
Final result: one nyancat party.
nyanegg?
Just for fun: some egg?
End result:
Not so great. I await the shopbot 3D mold.
hot glue mold: jello legos
Previously on Bad Ideas:
Hot glue is nontoxic, right? Legos used to create positive for hot glue. Crisco applied as releasing agent -- did not release well, had to pry out legos, destroying them. Jello poured in -- very nice, can even see the “LEGO” lettering on the bumps. Jello lego’s had flat bottoms though, since this is a one-part mold.
nyancake?
On Saturday, I learned that I now have media lab shop access and can now devote my entire weekend to MAS.863! Yay!
I made the model in Solidworks while still hoping I could get my hands on some food safe silicone. This didnt happen, though Iḿ not sure why. Ah well. I went ahead anyway and cut my model on the shopbot out of foam
.
1/8´’ bit, though later I remember I had resized my model specifically for a 1/4´’bit which could have cut my time down by half. After 1.5 hours of cutting I had my mold (the partworks estimate was 45 minutes). The deepest parts the shopbot just barely cleared (that was nervewracking!). The cut-out toolpath the shopbot most definitely did not clear -- I was prepared and hit the e-stop button immediately.
There were a lot of burrs and the finish quality was less than what Id expected. But Iḿ not complaining, since Iḿ using a shopbot to cut out an internet meme...
I attempted to deburr with a heat gun but stopped immediately when I realized I was rounding out my beloved sprinkles. I ended up using an air compressor and getting pink sprinkles all over myself.
Then I cast a negative mold with smooth-on silicone, in this case mold star slow since the arch shop was out of oomax 25. Pot time 50 mins, cure time 4 hours. After 1.5 hrs I took my mold with me instead of waiting. Mold turned out fine. Probably used half a smooth-on set of material.
I had to commit some violence to the mold original in order to get the silicone out, simply due to the geometry of the piece. The silicone separated from the foam just fine.
Drystone casting followed. Required almost exactly ~1.5 cups of material. (500grams?)
Oh, this reminds me, I´ve done sand casting before too. We helped sand-cast a cement health-friendly stove in La Vaquita, Mexico. This was a government initiative of some sort.
Files coming soon. [edit: 4 Sept 2012. So maybe not soon. But I'll try to get around to it. Also I would like to point out to blog readers that I went on to make nyancake and nyanjello! :D http://orangenarwhals.blogspot.com/search/label/nyancake


Appreciate your sharing, great article post. Really looking forward to reading more from this blog. Keep sharing!
ReplyDeleteSand Casting Metal