Lab 1A
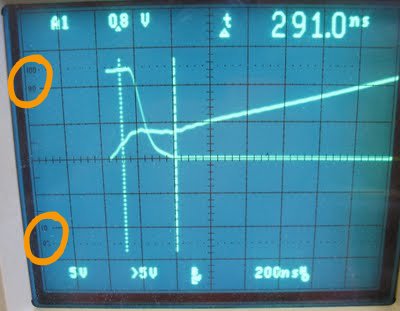
- 10-90 marks to the far left of the screen --> line signal up at 0-100 (use "var" [see Fig. 2] to resize voltage divs as needed), then use 10-90 marks + the cursors to measure 10-90% rise times

Fig1. thanks Shane for unwittingly donating this image - function generator has "sync" output --> trigger off of that
- "to give yourself some more time to make the measurements, you can increase the intensity of the beam so the persistence lasts longer. Also triggering off of the signal generator's 'sync' line can help produce more regular triggering. The scopes generally trigger better on high frequency signals, so for those measurements that are not frequency dependent, using higher frequency input signals may produce results that are easier to handle."
Lab 1B
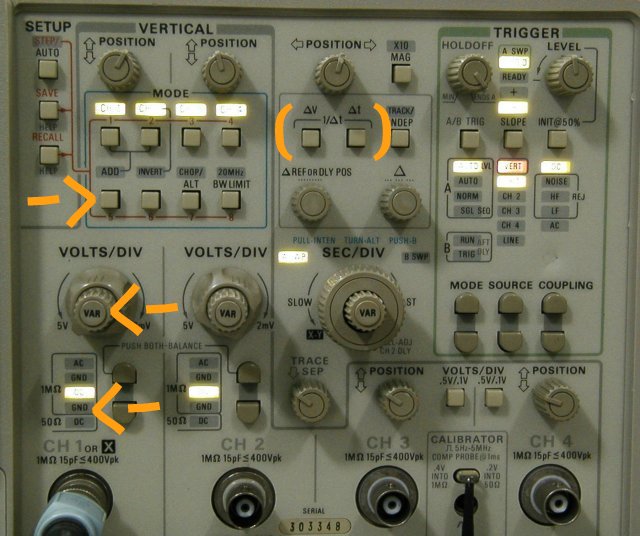 |
| Fig 2. thanks Lim Siong Boon for unwittingly donating this |
- if you have more than one output option selected, also select "chop" to show them simultaneously, otherwise scope will show one signal, then the other
- to show "add"d result, turn off all the other buttons (it only adds ch1 and ch2, depressing those buttons does not help it)
- no need to unplug the scope probe, simple switch output to "GND" to get where the ground line is (for zeroing)
- Not a oscope tip, but
- wrt the amp: there are rail-to-rail amps and the other ones are almost rail-to-rail. the amp / rails limits how fast your system responds at high freqs
- impulse = frequency response because in Laplace = 1, aka sweeps all the freqs
- step is just frequency response settled to DC
- voltage driven, response to input limited by back EMF; current-driven, not so
List will be updated as term goes on
No comments:
Post a Comment